
Back in May 2018, Google announced the Android Jetpack. Jetpack components are a collection of libraries that are individually adoptable and built to work together while taking advantage of Kotlin language features that make you more productive.
The Navigation Architecture Component simplifies implementing navigation, while also helping you visualize your app’s navigation flow. The library provides a number of benefits, including: - Automatic handling of fragment transactions - Correctly handling up and back by default - Default behaviors for animations and transitions - Deep linking as a first class operation - Implementing navigation UI patterns (like navigation drawers and bottom nav) with little additional work - Type safety when passing information while navigating - Android Studio tooling for visualizing and editing the navigation flow of an app - Summary: With the navigation component, there’s no longer a need to manually handle fragment transactions, it takes care of it internally. - This post wouldn’t teach everything involved in Navigation, but will help you get started as easy as possible. Let’s get started!
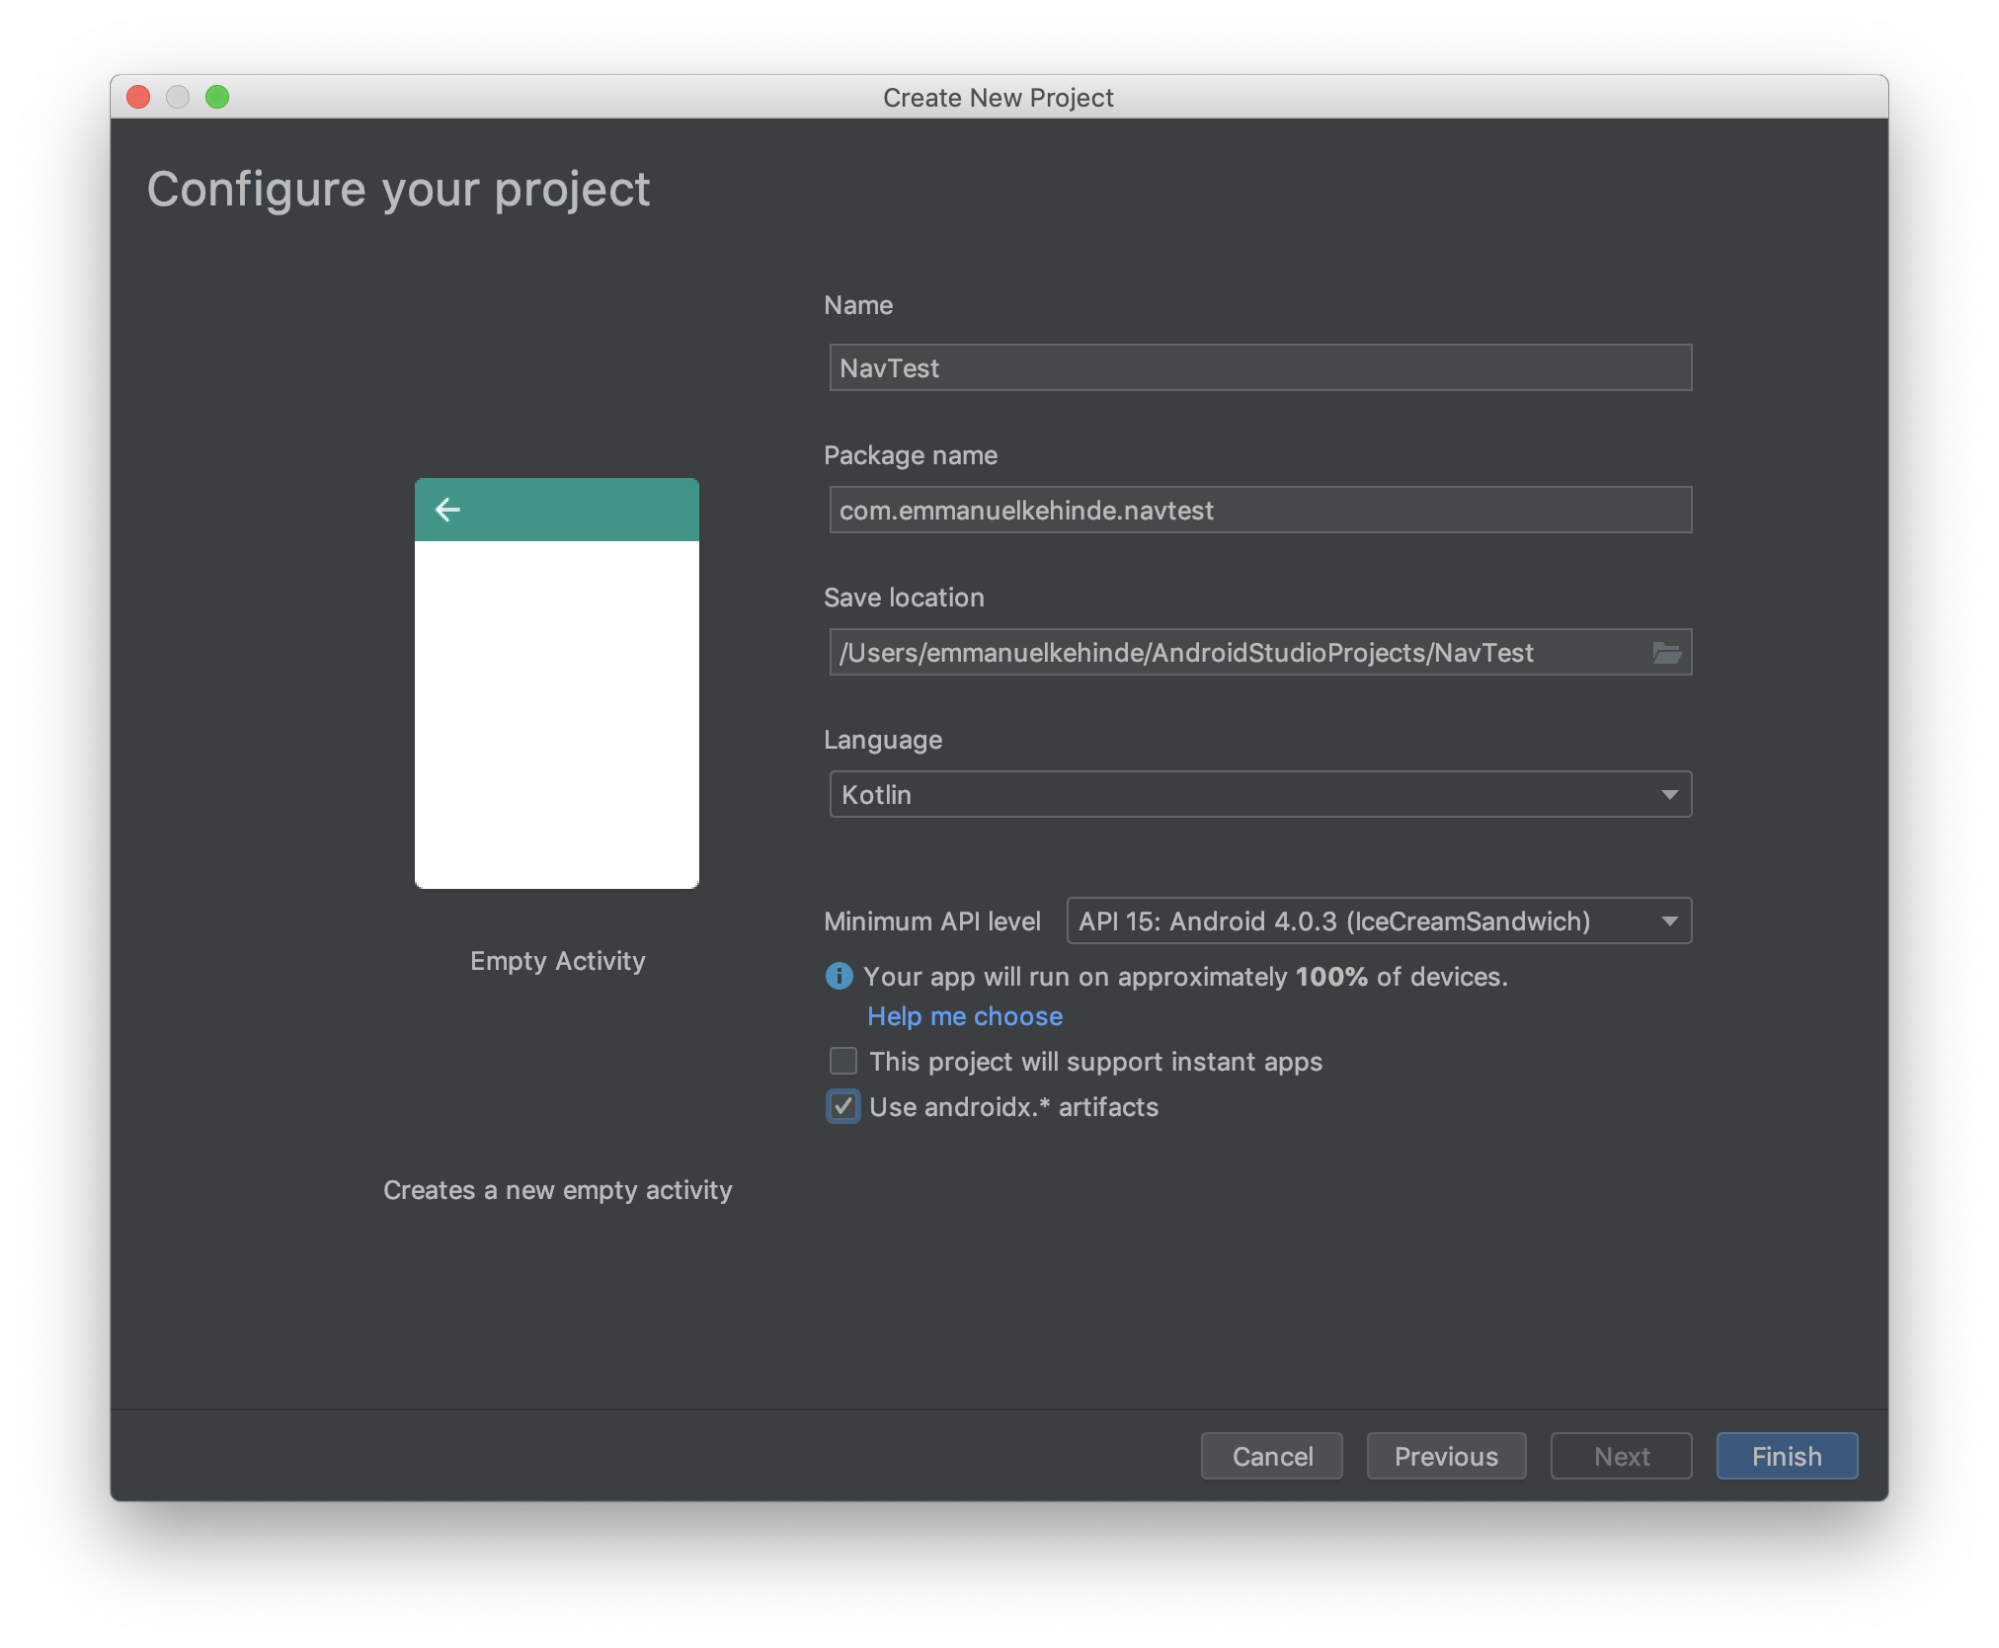
Create a New Android Project
Create new android project and name it NavTest. Please note that we will be making use of kotlin language for this project.
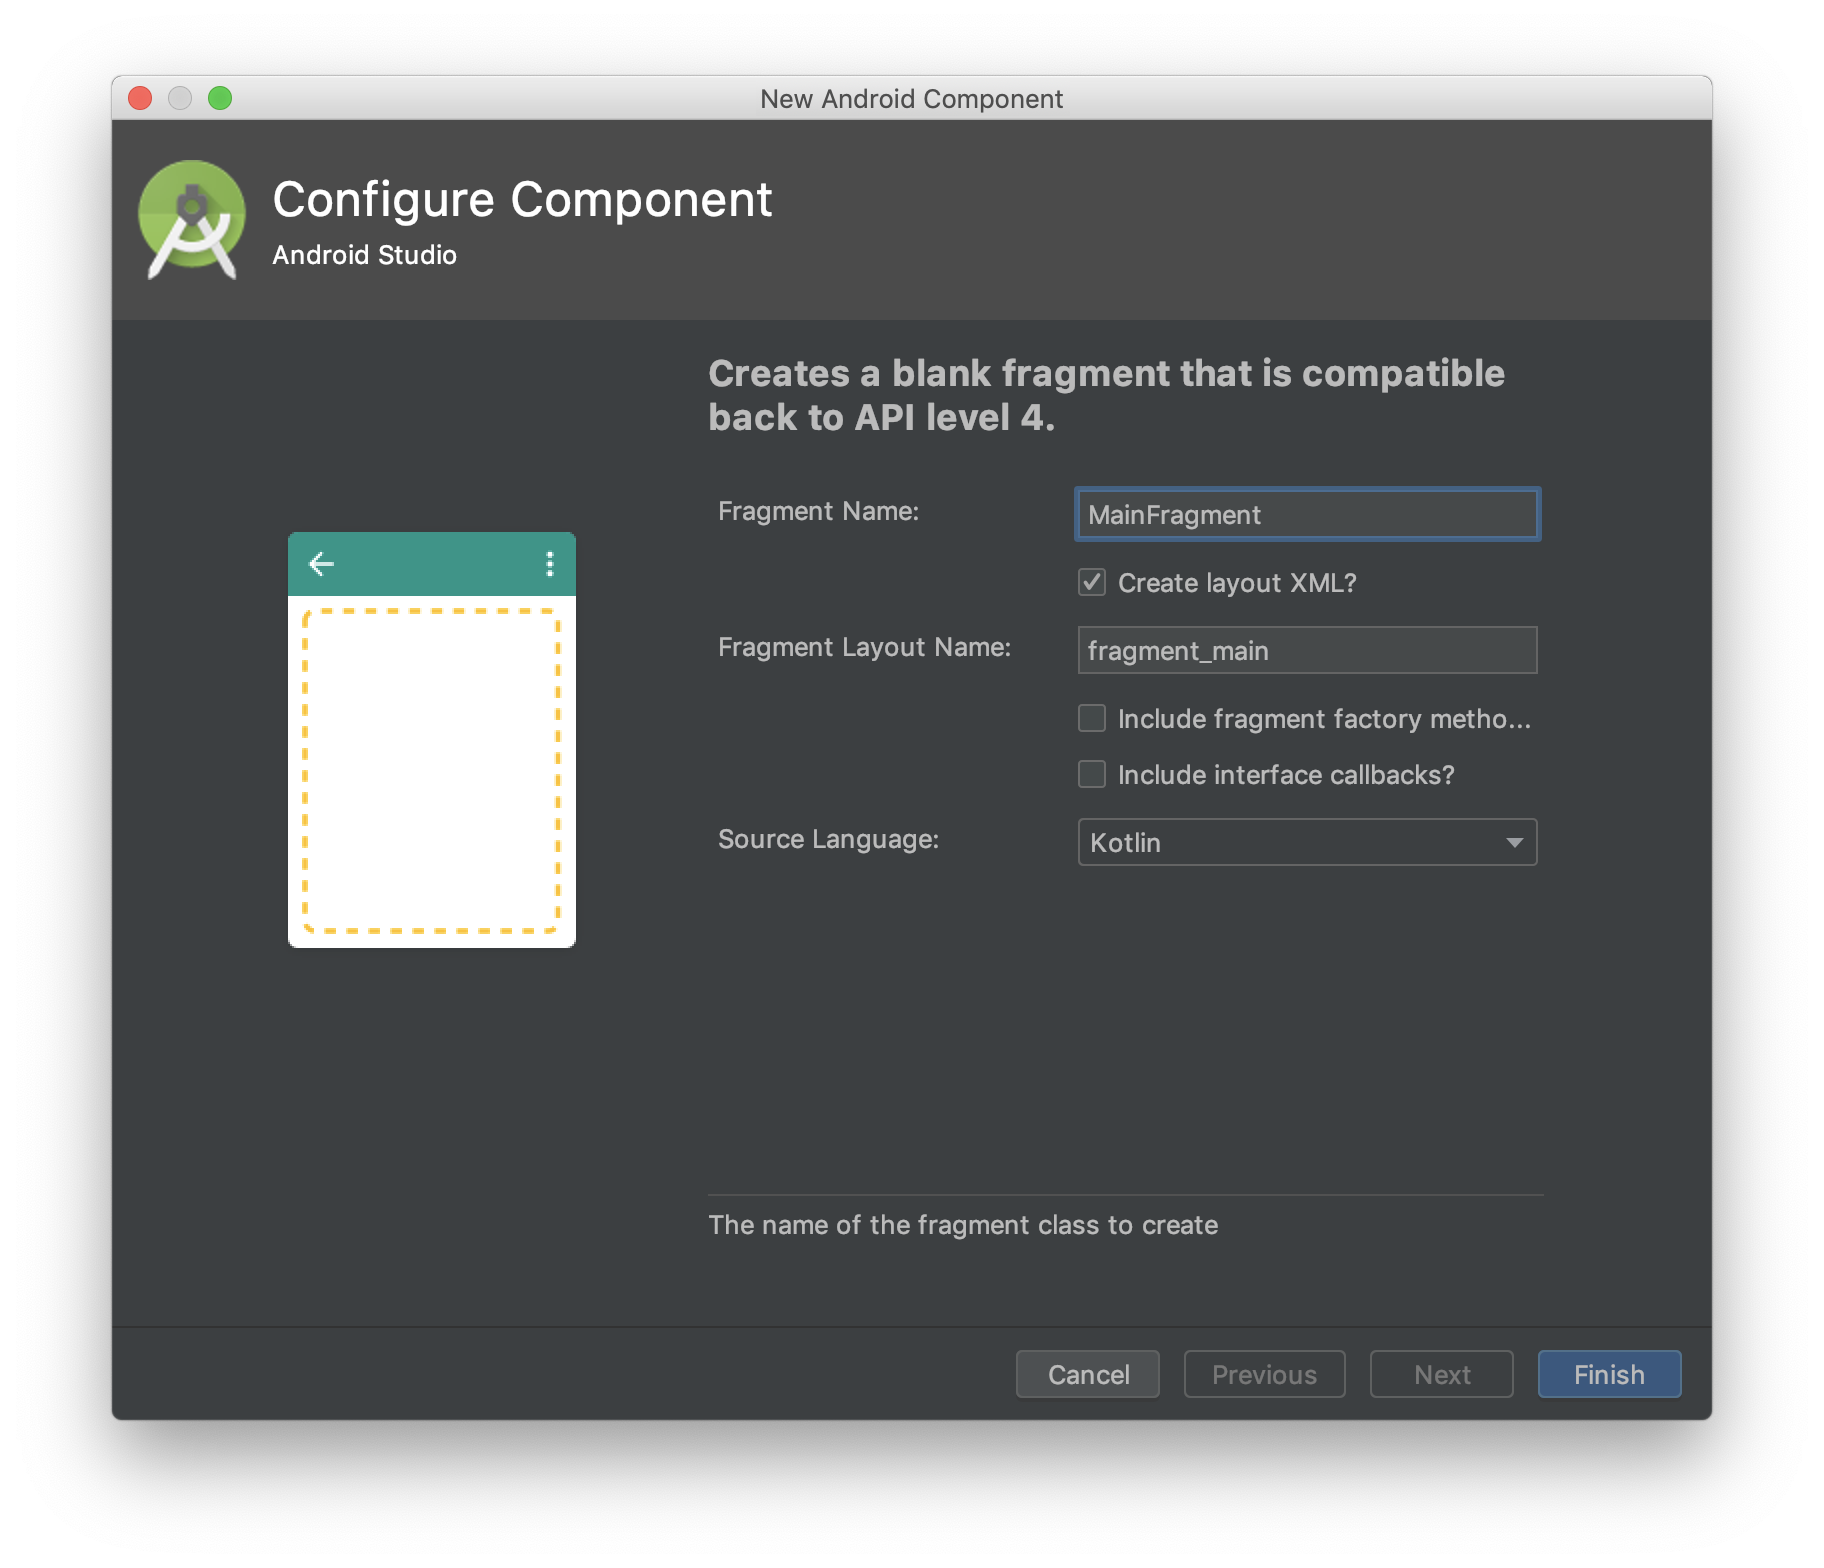
Create Three Fragments
Create three different fragments, MainFragment, LoginFragment, RegisterFragment, as shown below.
Import the Navigation Libraries
Next is to import the Navigation Libraries into our android project. Add the dependencies in the build.gradle file.
dependencies {
    def nav_version = "2.1.0-alpha04"

    implementation    "androidx.navigation:navigation-fragment-ktx:$nav_version" // For Kotlin
    implementation "androidx.navigation:navigation-ui-ktx:$nav_version" // For Kotlin
}
Now that we our dependencies setup, let’s look at the anatomy of the Navigation Component.
The Navigation component consists of three key parts that are described below:
- Navigation graph: An XML resource that contains all navigation-related information in one centralized location. This includes all of the individual content areas within your app, called destinations, as well as the possible paths that a user can take through your app.
- NavHost: An empty container that displays destinations from your navigation graph. The Navigation component contains a default NavHost implementation, NavHostFragment, that displays fragment destinations.
- NavController: An object that manages app navigation within a NavHost. The NavController orchestrates the swapping of destination content in the NavHost as users move throughout your app.
Create Navigation Graph
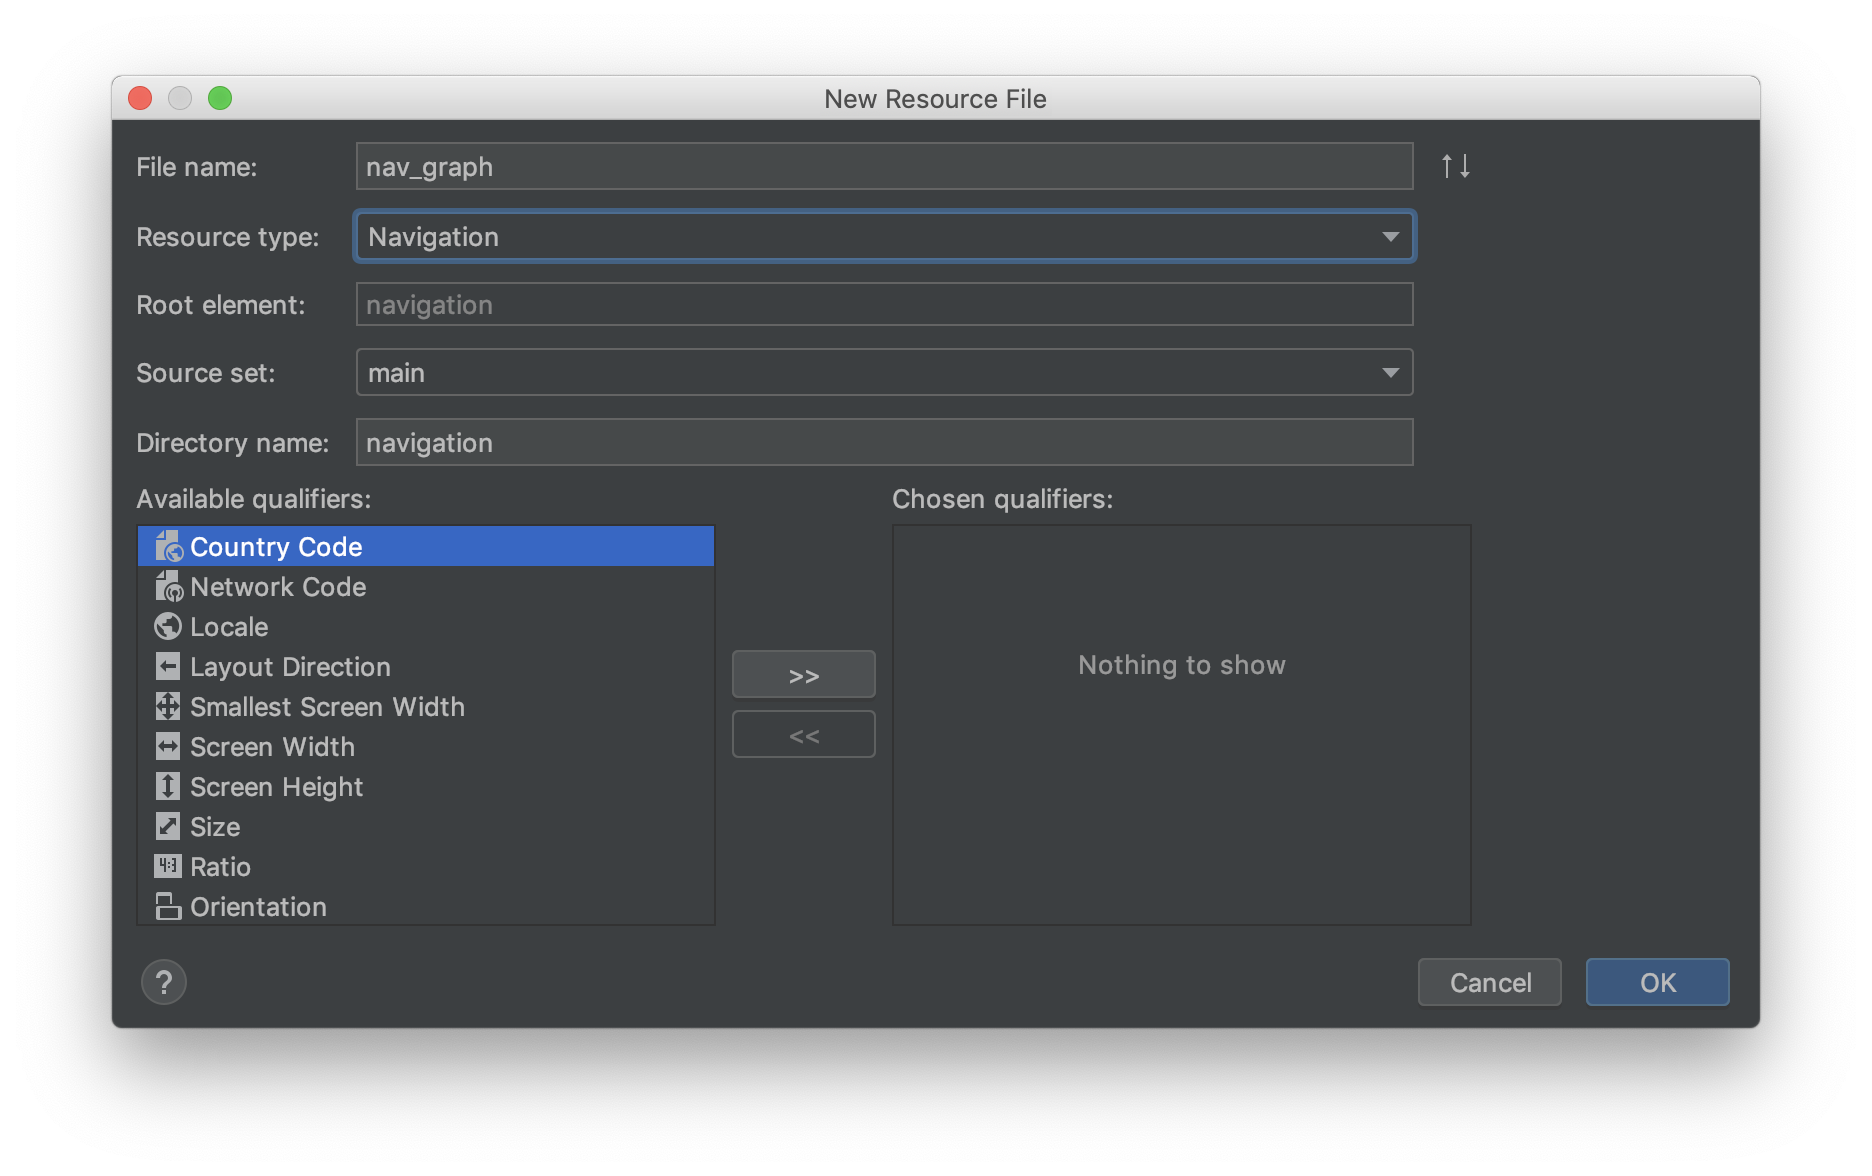
A navigation graph is a resource file that contains all of your destinations and actions. The graph represents all of your app’s navigation paths.
Create a new Android Resource File from the res directory. Set the Resource type to Navigation. Set the filename as nav_graph as shown below.
Add a NavHost to the MainActivity
Add a fragment to the activity_main xml layout file, as shown below. Also, add a Toolbar, which we will make use of later.
<?xml version="1.0" encoding="utf-8"?>
<androidx.constraintlayout.widget.ConstraintLayout
    xmlns:android="http://schemas.android.com/apk/res/android"
    xmlns:app="http://schemas.android.com/apk/res-auto"
    xmlns:tools="http://schemas.android.com/tools"
    android:layout_width="match_parent"
    android:layout_height="match_parent"
    tools:context=".MainActivity">

    <fragment
        android:id="@+id/nav_host_fragment"
        android:name="androidx.navigation.fragment.NavHostFragment"
        android:layout_width="0dp"
        android:layout_height="0dp"
        app:defaultNavHost="true"
        app:layout_constraintBottom_toBottomOf="parent"
        app:layout_constraintLeft_toLeftOf="parent"
        app:layout_constraintRight_toRightOf="parent"
        app:layout_constraintTop_toBottomOf="@+id/toolbar"
        app:navGraph="@navigation/nav_graph" />

    <androidx.appcompat.widget.Toolbar
        android:id="@+id/toolbar"
        android:layout_width="0dp"
        android:layout_height="wrap_content"
        android:background="?attr/colorPrimary"
        android:minHeight="?attr/actionBarSize"
        android:theme="?attr/actionBarTheme"
        app:layout_constraintEnd_toEndOf="parent"
        app:layout_constraintStart_toStartOf="parent"
        app:layout_constraintTop_toTopOf="parent" />

</androidx.constraintlayout.widget.ConstraintLayout>
What we are basically doing is setting the fragment as the NavHostFragment and specifying a graph file, “nav_graph” to use.
Add destinations to the navigation graph
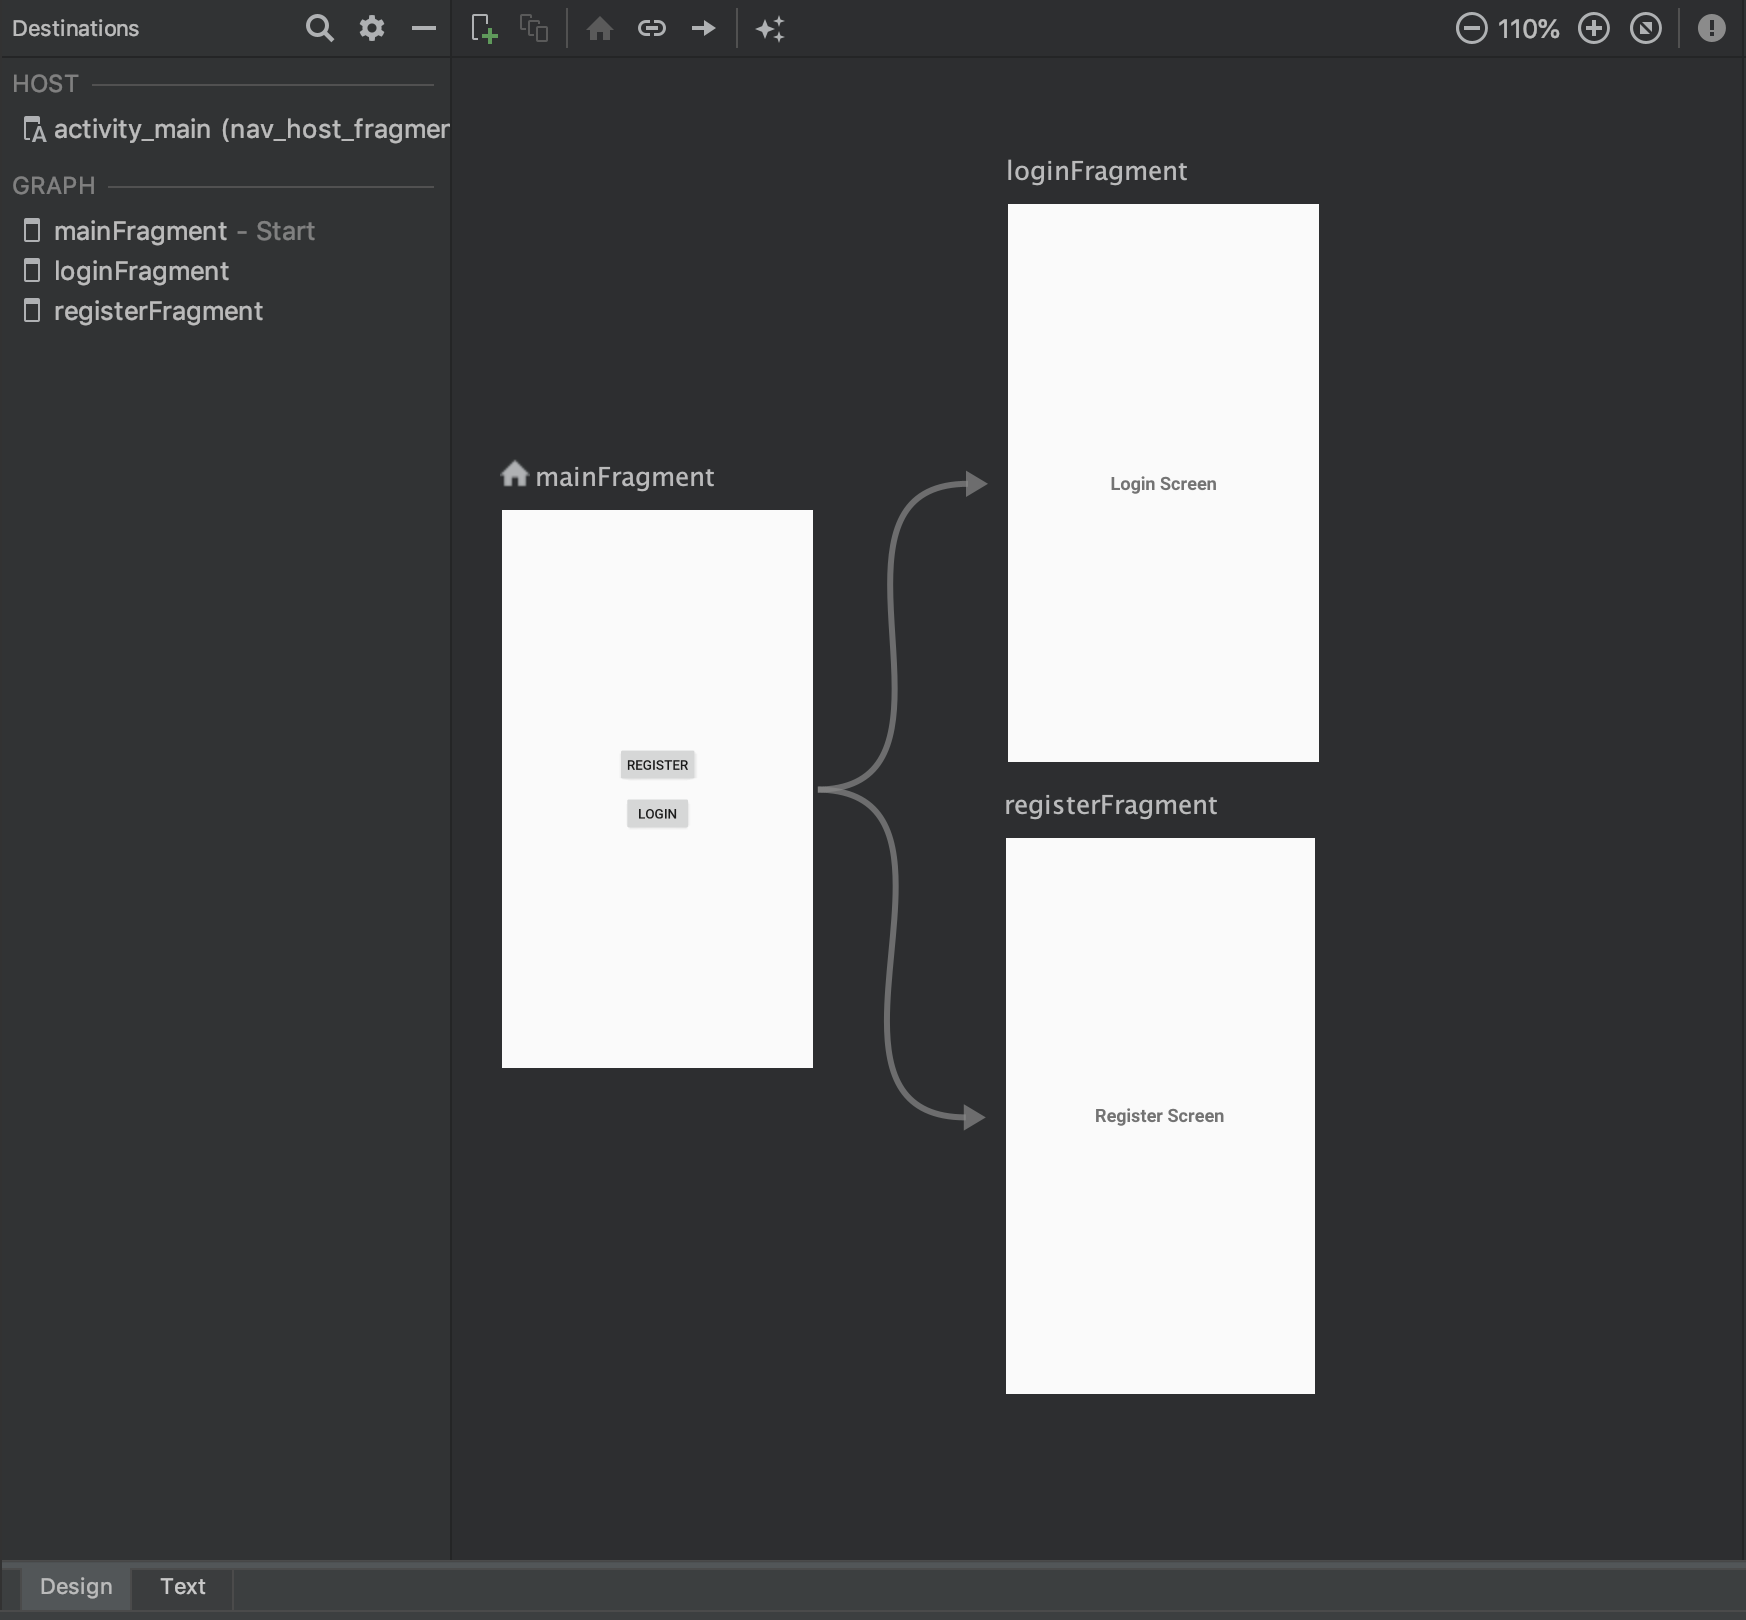
To add a new destination type using the Navigation Editor, click on the Plus (+) button, select the “fragment_main” layout that we created. Do the same for “fragment_login” and “fragment_register”. Arrange the destinations well to look as shown below.
Meanwhile, I have added some layouts in the fragments to make it look like we want a
Register or Login page to look. I have also added two buttons to the MainFragment,
which we will use to navigate to the other two fragments.
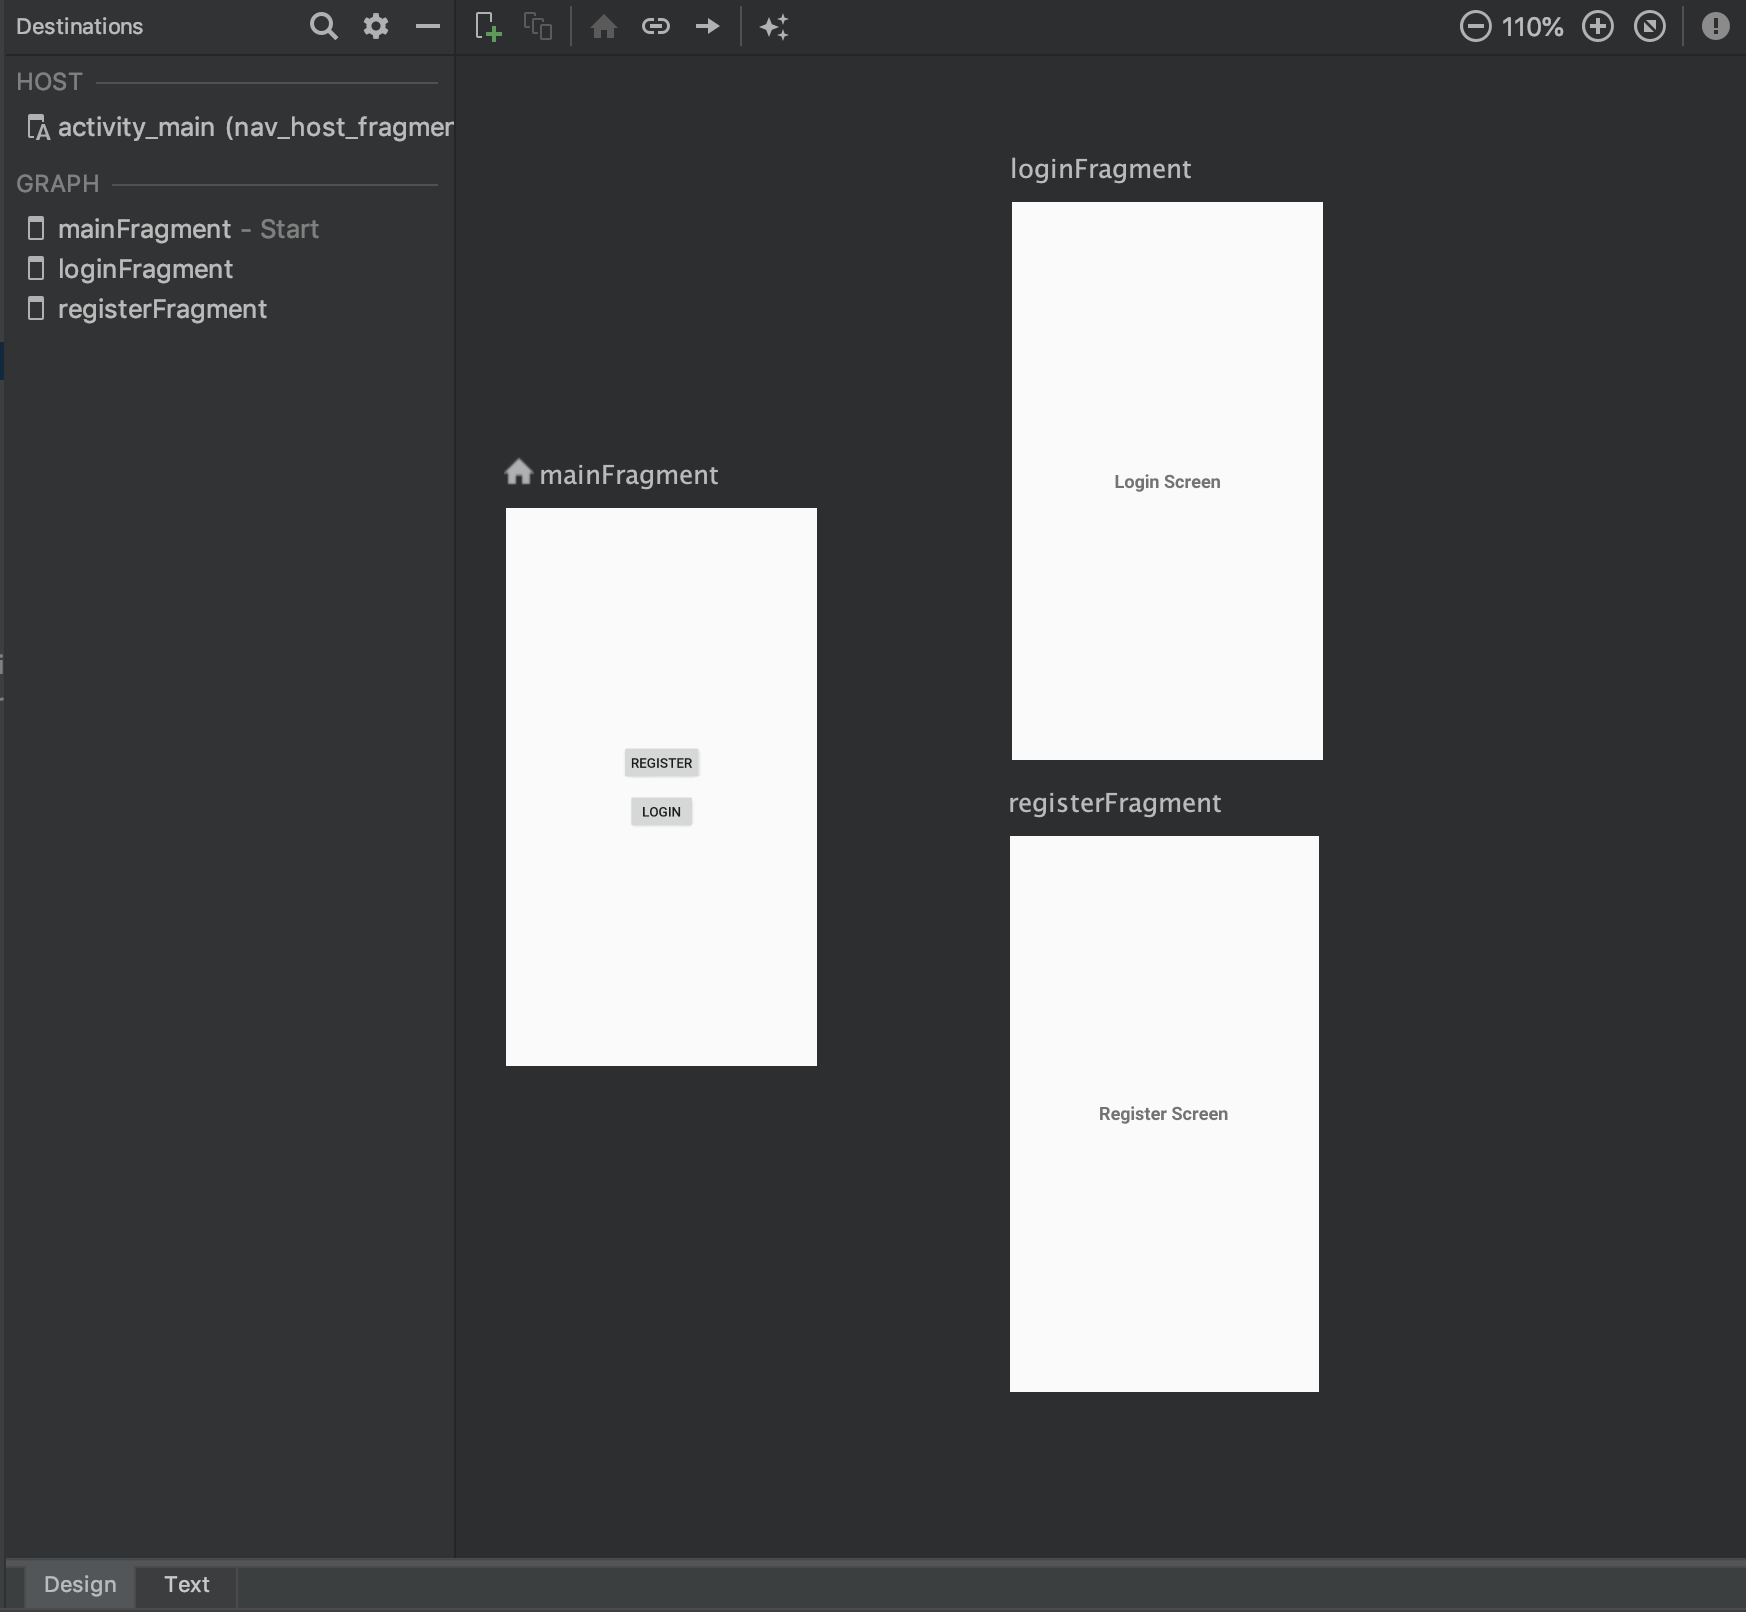
Connect destinations
In the Design tab, hover over the right side of the MainFragment, click and drag from the circle that appears to the LoginFragment. Do the same from MainFragment to the RegisterFragment, so you have something as shown below.
Click the Text tab to toggle to the XML view. An action element is now added to the source destination (MainFragment). The action has an ID and a destination attribute that contains the ID of the next destination, as shown in the example below. It is with this ID that we will navigate to the various destinations (Login and Register).
Still on the Text tab, change the label attribute of the MainFragment, LoginFragment and RegisterFragment to Main, Login and Register respectively.
After these, your layout should look like this:
<?xml version="1.0" encoding="utf-8"?>
<navigation xmlns:android="http://schemas.android.com/apk/res/android"
    xmlns:app="http://schemas.android.com/apk/res-auto"
    xmlns:tools="http://schemas.android.com/tools"
    android:id="@+id/nav_graph"
    app:startDestination="@id/mainFragment">

    <fragment
        android:id="@+id/mainFragment"
        android:name="com.emmanuelkehinde.navtest.MainFragment"
        android:label="Main"
        tools:layout="@layout/fragment_main">
        <action
            android:id="@+id/action_mainFragment_to_loginFragment"
            app:destination="@id/loginFragment" />
        <action
            android:id="@+id/action_mainFragment_to_registerFragment"
            app:destination="@id/registerFragment" />
    </fragment>
    <fragment
        android:id="@+id/loginFragment"
        android:name="com.emmanuelkehinde.navtest.LoginFragment"
        android:label="Login"
        tools:layout="@layout/fragment_login" />
    <fragment
        android:id="@+id/registerFragment"
        android:name="com.emmanuelkehinde.navtest.RegisterFragment"
        android:label="Register"
        tools:layout="@layout/fragment_register" />
</navigation>
Navigate to a destination
Now, we will navigate to the Login and Register fragments when each of the buttons on the Main Fragment is clicked. The code below shows how that is done:
Here is the explanation of the code:
- findNavController finds the NavController for the fragment.
- navigate(int) takes the resource ID of either an action or a destination. So we pass in the ID of the action that described the navigation from a source to destination as described in the nav_graph xml.
Simple!
Configuring the AppBar
Just like I said, NavigationUI handles back button internally, but you have a little configuration to do. Place the following code in the MainActivity onCreate.
val navController = findNavController(R.id.nav_host_fragment)
val appBarConfiguration = AppBarConfiguration(navController.graph)
toolbar.setupWithNavController(navController, appBarConfiguration)
Here is the explanation of the code: - We are getting the NavController by passing in the ID of the NavHostFragment we created. - Then, we create an instance of AppBarConfiguration and pass in the graph used by the NavController. - Then, we call the setupWithNavController extension function of the Toolbar (that we added earlier) and pass in the NavController and the AppBarConfiguration.
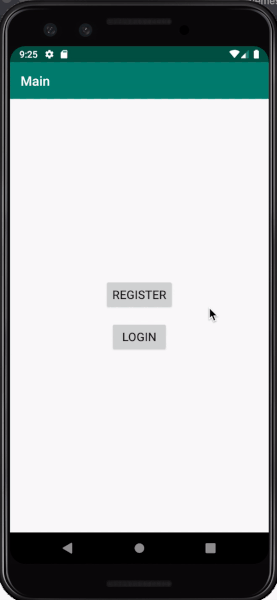
Now, everything is set. Run the app and you should something like this:
There is still a lot to NavigationUI than described here. This is meant to help you get started. You can checkout the Navigation documentation to learn more.
Peace out!